I don’t enjoy cooking so I’m not a fan of spending time in the kitchen. The one thing that makes meal times tolerable is having well-organised cabinets and drawers to streamline the process. Then, I can get back to doing the things I like. Whether you are a happy chef or a pot clasher like me, good kitchen organisation is key.
Kitchen Organisation Starts With Food Habits
When my oversized fridge-freezer failed, I was limited to food essentials. I bought only what we could use quickly and certainly. It dawned on me how much food waste we’d been causing and how much I stashed long-term.
There are lots of ways to be more mindful of food waste. Meal planning for the week discourages random supermarket purchases. Proper food storage prevents things from going stale. Realistic portion awareness makes it less likely you’ll cook too much and leave leftovers rotting in the fridge.
Step 1: Fridge Organisation
The first step in kitchen organisation is to simplify cold food storage and reclaim space in your fridge and freezer:
- Rehome foods you don’t need to put in the refrigerator, you’ll be surprised how many there are
- Purchase only when you’ve used up your existing stockpile so things don’t get lost in the back
- Shop more consciously, purchasing only things you actively need and use
Food containers:
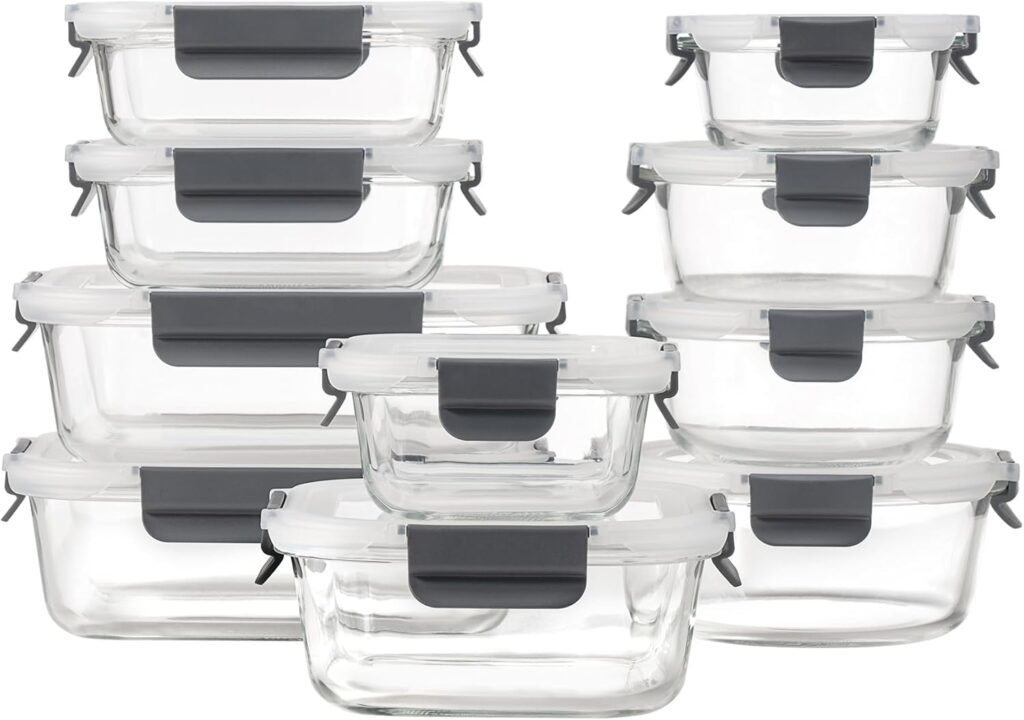
Once you’ve gotten down to the nitty-gritty, rethink your shelf space. Glass food containers allow you to see what’s inside them so leftovers don’t go to waste. Clear containers encourage healthy snacking habits too. Fill them with prepped fruit and veggies and place them at eye level.
Glass food containers are a small investment but are far superior to plastic tubs. Oven-safe containers cut out the middle man when reheating–and save on washing up. Glass is better for the environment than plastic that will peel, warp, stain and end up in landfills. It doesn’t leech chemicals into food after being repeatedly heated and scoured, making them better for health.
Fridge organisers:
Plastic does have its place though. Clear perspex fridge organisers neatly organise small pots and packets into fridge categories, like kids snacks, spreads, condiments etc. Lightweight plastic is convenient to lift from the fridge when prepping packed lunches for school or for work.
Choose fridge trays that stretch all the way to the back of your refrigerator to maximise storage space. Narrow trays work best for grouping and easy-grab items.

Step 2: Canisters and Pantry Organisation
Perhaps multicoloured food packaging doesn’t rattle your sense of zen–or maybe you’ve just not experienced a calmer alternative. A kitchen pantry loaded with a colour-coordinated “filing system” of matching food containers, instead of a bombardment of brands, is seriously satisfying.
Try it for yourself with a starter set of canisters, and create a tidy shelf. There are no hangers-on allowed here, this is your zen shelf. Note how the simplicity and order, in comparison to a mismatched neighbouring shelf, quietens the mind.
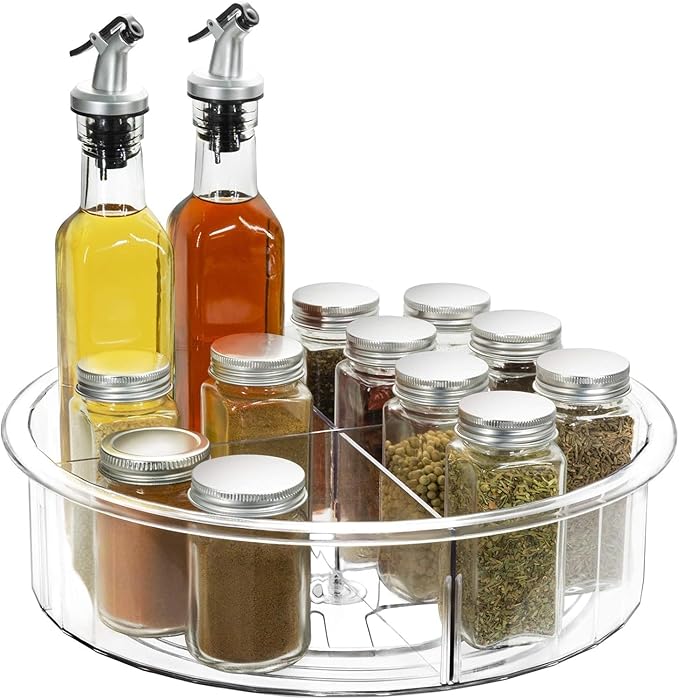
Of course, not everything lends itself to decanting. For this category of food items, you’ll need a selection of larger storage vessels. Wicker baskets work well for snack packets and treats. A rotating lazy susan is ideal for cooking oils and condiments, and an expandable shelf organiser keeps canned goods in check.
Step 3: Pantry Labels
When you decant into containers, add pantry labels. A bit of detective work was needed to do a spot of baking after finishing my new kitchen organisation. At the very least, define plain flour from self-raising flour and thank me later.
Chalkboard labels are ideal if you like to keep changing things up. If you like to get crafty, use a Cricut Joy to produce aesthetic canister labels. Cut and stick the product expiry date and any instructions to the base or back.
You can find lots of pantry organisation inspiration on the Reshaping Home Pinterest boards.
Step 4: Pare-back Dishes for Lasting Kitchen Organisation
This being the age of the blessed dishwasher, it’s easy to figure out if we’ve accumulated excess day-to-day plates, bowls, cups and drinking glasses.
Be realistic. If you have more than one dish load then the extras likely never see the light of day. Or, dirty dishes pile up on the countertop because you lack the incentive to run the washer regularly.
Do yourself a favour and donate excess dishes to charity in exchange for good vibes and clear benches.
Step 5: Pan Organisation and Kitchen Utensils
If your pot cupboard avalanches every time you jenga out a saucepan, or utensils jangle judgmentally in an overfilled drawer, it’s time to hone to perfection.
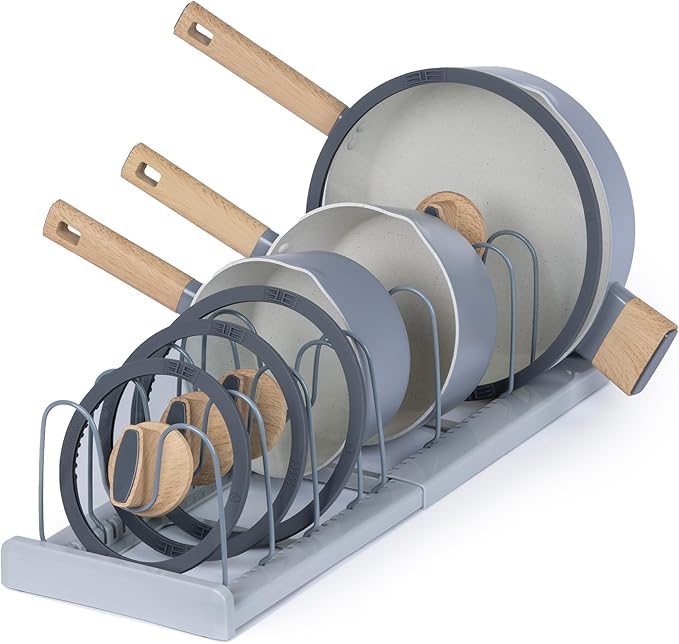
Cooking needs differ, but most can get by on a set of saucepans in 3 sizes, a small and large frying pan, and perhaps a 3 tier steamer. I prefer a folding steamer basket that converts any pan into doing the job; it saves massively on storage space.
After the cull, the survivors should stack nicely. If you want to avoid the clang-banging of pulling out the right pot, a horizontal adjustable pan organiser creates more peace in the kitchen. I prefer storing pots and pans in a deep drawer rather than a cupboard, so items stay within easy reach and don’t get pushed to the back.
Be ruthless when sorting through cooking utensils. Do you use that melon baller? Is the ice cream scoop overlooked in favour of a simple spoon when serving? Only keep what you use daily or weekly for streamlined kitchen organisation.
Kitchen chaos amasses quickly, but mindful changes bring peace to purpose.
Recommended Reading:
A Kickstart to Decluttering
How To Declutter: Analyse, Separate, and Regroup